The HPCsec Protect Adapter is a passive ingestor, its purpose is to forward logs securely to the HPCsec Protect environment in order that rules can be applied and notifications sent. The adapter itself does not perform any function other than forward data for inspection, it cannot be used to undertake operations like isolating hosts or reacting to activities which it identifies.
By default we advise, and this guide takes us through, setting up the adapter in order to forward syslog for inspection, however, what you chose to forward is entirely up to you. If you wish to only take advantage of our detections for suspicious logins then you may only wish to forward authentication logs. If you have an appropriate subscription and wish to take advantage of Slurm, LSF, GPFS/Spectrum Scale, BeeGFS etc. detection capabilities then you will need to ensure that the appropriate logs are forwarded via the adapter.
We also provide an agent which focuses on behavioural activity, network activity, process and other information. It is also able to react to different activities that it identifies, for example terminating a known malicious process, providing ability to isolate a host under certain conditions etc. The agent itself comes with its own rules and capabilities and can work hand in hand with the adapter or standalone. The most optimal and powerful solution is to take advantage of the adapter and the agent. However, at this time we are not providing the agent for general availability, so you need to get in touch directly if you wish to take advantage of this.
The remainder of this guide is focused entirely on installing the adapter
Pre-Reqs
We use webhooks for notifications, you’ll need to set one of these up and have the URL available during the registration process. Slack, MS Teams and Google Chat are all tested, but platforms should work just fine too. We can host existing clients on our google chat platform if required, but you’ll need to get in touch first.
The adapter supports x86, IA-32, ARM-32, ARM64 architectures running Linux.
Your system will need to be able to reach our infrastructure. Outbound connectivity on TCP port 443 to md-adapt.hpcsec.net is necessary for communication to take place.
That is all. Our intention is to make this whole process as simple as possible.
Installation Video
If you would rather just watch the registration and setup process then you can watch here, otherwise there is more detail below:
Installation Options
There are two options for installing the adapter:
Option 1) Install it directly onto the host that you wish to forward logs from (shown in the video above)
Option 2) Install it on an intermediate host and forward logs to it
Whichever option you chose the installation is almost identical. We advise using the adapter to monitor the nodes which users log into. Administration and management nodes are also extremely valuable nodes to be monitoring. In most cases we would not advise utilising this for compute nodes, although if you wish to then you should follow option 2.
Installation can be completed in a matter of minutes.
Option 1
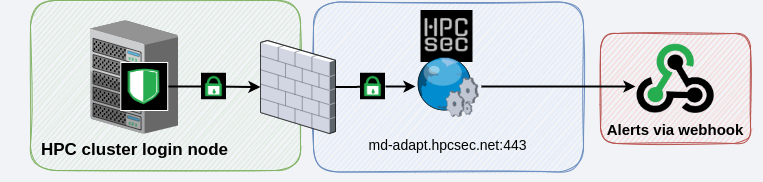
This is the method shown in the install video, it requires an additional entry to be added to your /etc/rsyslog.conf file in order to forward syslog to the adapter which is listening locally (by default 127.0.0.1:5514)
Option 2
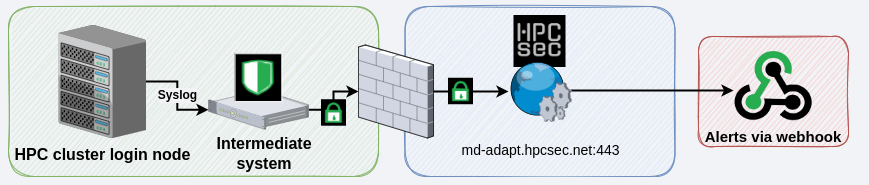
This method is identical to option 1 except rather than running the agent on the login node it is being run on an external node and the syslog is being sent to that host for forwarding. In this setup you can direct syslog from multiple nodes through the same adapter which has its benefits if you wish to monitor multiple hosts in an environment and don’t wish to install an adapter on each of them (or your HPC vendor would rather you didn’t). In this setup you then simply need to add a line to /etc/rsyslog.conf to forward to your remote listener. Just remember to change the configuration options on the adapter from 127.0.0.1 to the listening IP address of the intermediate host when you deploy the adapter.
Installation
Setting up your Webhook
If you don’t already have a webhook set up in your favourite chat client then do this first of all. We support Slack, MS Teams and Google Chat, although it is likely that other platforms also work. If you have not set up a webhook before then here are some guides which we think are quite good. Unless you have a paid subscription with Microsoft of Google webhooks are not available, therefore you will need to use Slack or some other alternative (we can set up existing clients within our environment should it be required):
Slack: https://api.slack.com/messaging/webhooks
The process in slack is a little more complex than other environments in that you need to create an app and use that. A slack webhook URL will look something like the following:https://hooks.slack.com/services/T00000000/B00000000/XXXXXXXXXXXXXXXXXXXXXXXX
MS Teams: https://learn.microsoft.com/en-us/microsoftteams/platform/webhooks-and-connectors/how-to/add-incoming-webhook?tabs=dotnet
Webhooks are not avilable in free versions of MS Office. A webhook URL for MS Teams will look something like the following:https://xxxxx.webhook.office.com/xxxxxxxxx
Google Chat: https://ploi.io/documentation/notifications/how-do-i-create-a-google-chat-webhook
Webhooks are only available in google chat for google workspace, if you’re not paying for a workspace subscription they will not be available to you. A webhook URL for google chat will look something like the following:https://chat.googleapis.com/v1/spaces/AAAAAAAAAAA/messages?key=xxxxxxxxxxxxxxxxxxxxxx-xxxxxxxxxxxxxxxx&token=xxxxxxxxxxxxxxxxxxxxxx-xxxxxxxxxxxxxxx-xxxx%3D
You can test that your webhook functions with the following command:
curl -H 'Content-Type: application/json' -d '{"text": "Hello World"}' https://webhook.example.com/your-webhook-urlRegistration
The registration process is all online and immediate. It takes you through the setup and enrolment and can get you up and operational in a matter of minutes.
You’ll find the registration form here.
Whilst all of the information you will need is provided during registration this guide shares a little bit more commentary
Invite Code
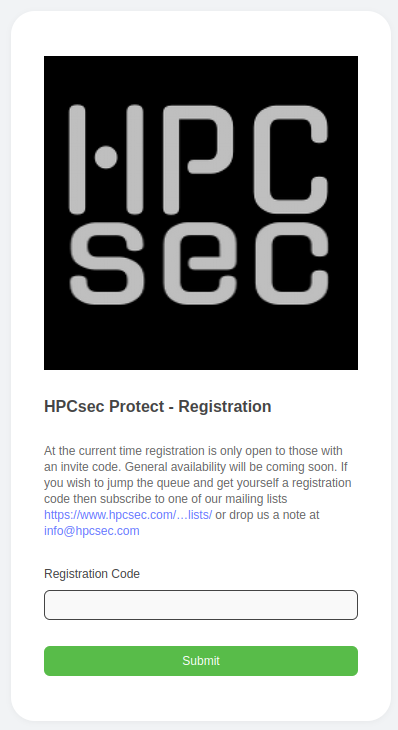
Whilst we’re very close to general availability we’re not quite there yet, so for the time being you’ll need an invite code in order to register. At the moment these are available to existing clients and our mailing list subscribers. If you really want in then you can always drop us a message
Webhook
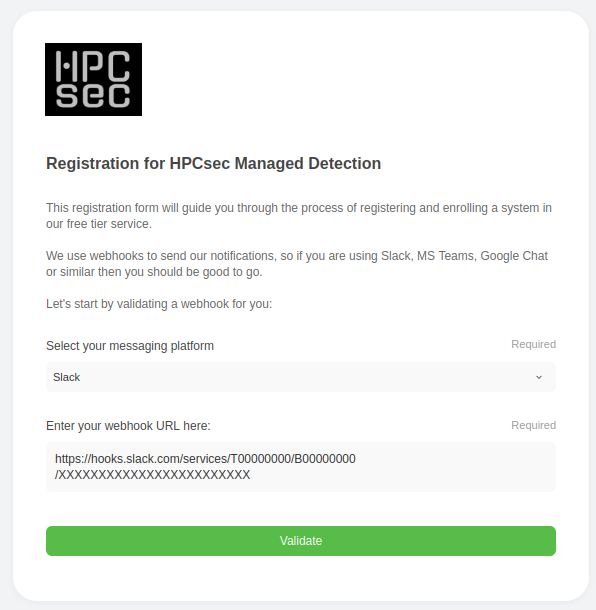
We use webhooks to notify you if detections are triggered, but we’ll also use it during the installation process in order to send you copies of your installation IDs and other useful information. We’ll also use this to send you authentication codes should you wish to make changes to your setup, check your status etc. We’re not into passwords, there are better ways to authenticate people!
The detections that we have designed at HPCsec are designed to be extremely high fidelity, so don’t expect to hear much from us, and if you do hear from us then it’s probably important. If you are used to platforms that swamp you with alerts and notifications you’ll find our approach refreshing!
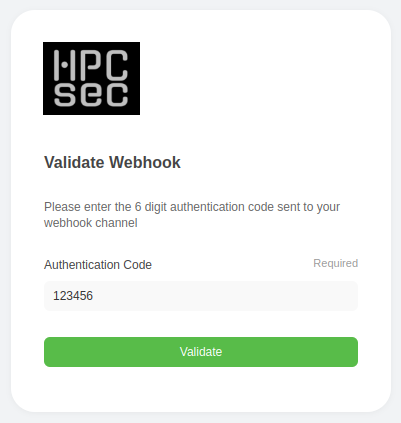
We’ll validate your webhook by sending you a code, just enter that in the next box and continue with the process
Additional Information
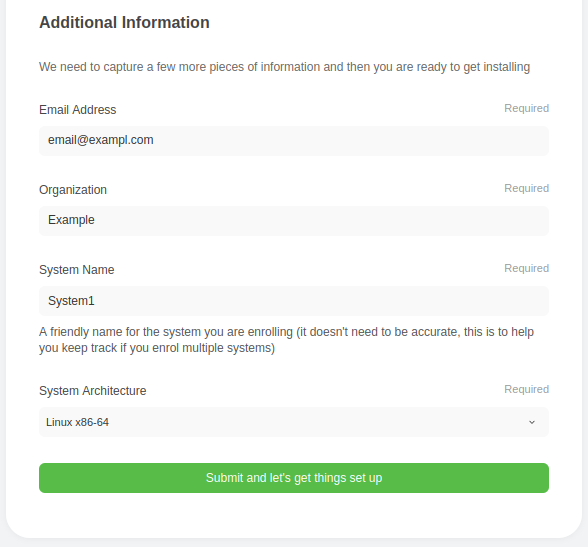
We then need to capture some additional information from you.
System name does not need to match the hostname of the system you are enrolling. For example, if you have a cluster imaginatively named “cluster” then feel free to put that there, even if the node you are going to drop the adapter on is called something like “login01”. This is for your reference rather than for correlation at the backend when we are doing detections.
When you hit the submit button a request is made to the HPCsec Protect environment and all of the necessary setup happens ready for you to deploy your adapter and enrol.
Installation
Installation is pretty straightforward:
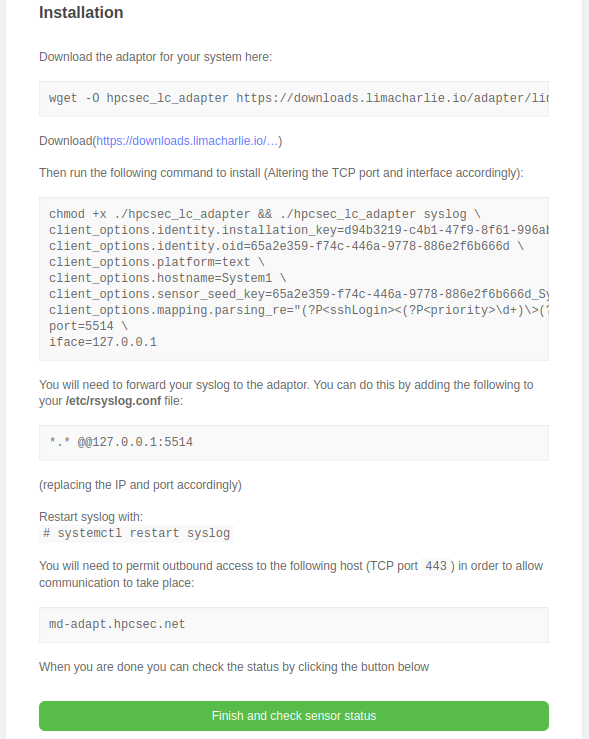
- There is a wget command that you can use to download the adapter, this will match the architecture that you selected earlier in this registration process. The adapter is part of the limaCharlie suite, so nicely tried and tested and known to be stable and secure. If you download from the link given rather than through the wget command, ensure that you save the adapter with the name “hpcsec_lc_adapter”
- Next there is a much longer command which you can copy and paste. This starts the adapter with the necessary options for it to check into the HPCsec Protect environment. At the bottom of that command are two options “port” and “iface”:
- The default port we use id TCP port 5514. This is the port that the adapter will listen on for syslog data. If you wish to use a different port that is fine, just ensure that port is available on your host and edit in the command
- The adapter is set up to bind to localhost (127.0.0.1) only. This is fine if you are installing using option 1, but if you are installing using option 2 (an intermediate host), then you will need to change this to reflect the IP address of the interface on that host which you would like the adapter to listen
- When you run the command hopefully you will see everything start up OK and to our environment. If not then please ensure that you have allowed outbound connectivity to port 443 on the following host: md-adapt.hpcsec.net
- If you intend to take advantage of other elements of HPCsec Protect then you should also take this opportunity to ensure outbound access to port 443 on the following hosts is also permitted:
md-adapt.hpcsec.net, md-art.hpcsec.net, md-np.hpcsec.net, md-p.hpcsec.net
- If you intend to take advantage of other elements of HPCsec Protect then you should also take this opportunity to ensure outbound access to port 443 on the following hosts is also permitted:
- Next you need to forward your syslog traffic to the adapter. This can be done by simply adding the line
*.* @@127.0.0.1:5514, of course, if you changed the IP address or port then you’ll need to change them here too. - Then restart ryslog. If you want to just trigger some events you can use the “logger” command to do this, but it shouldn’t be necessary
Setup Commands
If you need them, these are the different commands that you’ll need to setup HPCsec Protect in your environment:
Download the adapter
x86_64: wget -O hpcsec_lc_adapter https://downloads.limacharlie.io/adapter/linux/64
IA-32: wget -O hpcsec_lc_adapter https://downloads.limacharlie.io/adapter/linux/32
arm32: wget -O hpcsec_lc_adapter https://downloads.limacharlie.io/adapter/linux/arm32
arm64: wget -O hpcsec_lc_adapter https://downloads.limacharlie.io/adapter/linux/arm64
Start the adapter
chmod +x ./hpcsec_lc_adapter && ./hpcsec_lc_adapter syslog \
client_options.identity.installation_key=<installation-key> \
client_options.identity.oid=<organisation-id> \
client_options.platform=text \
client_options.hostname=<hostname> \
client_options.sensor_seed_key=<sensor-seed-key> \
client_options.mapping.parsing_re="(?P<sshLogin><(?P<priority>\d+)\>(?P<date>\w{3}\s+\d?\d \d\d:\d\d:\d\d) (?P<host>.+) (?P<exe>.+?)\[(?P<pid>\d+)\]: (?P<message>(?P<messageType>\w+) (?P<authtype>.+) for\s?(?P<invalidUser>.*) (?P<username>\w+) from (?P<ip>.+) port (?P<port>\d+)\s(?P<sshversion>(\w\w\w\d)?):?(?P<sshkey>\s?(?P<sshKeyType>(\w*)\s?(?P<sshKeySignatureType>(\w+)?):(?P<sshKeySignature>\w*)))?))" \
port=5514 \
iface=127.0.0.1
Copy and paste all lines of the command into your terminal. You’ll need to replace the information above with the various keys that you are assigned during the enrolment process.
NOTE: The adapter does not run as a daemon by default. Something like “screen” or “tmux” might be suitable for testing purposes, but we strongly recommend setting your system up so that the adapter starts at boot, perhaps through use of systemd, init.d or even cron.
Modify Syslog
On most systems you’ll find the syslog configuration in /etc/rsyslog.conf . You need to add the following to forward your syslog:
*.* @@127.0.0.1:5514Restart Syslog
systemctl restart syslogEnsure connectivity
The adapter will need to be able to communicate with the following host on port 443:
md-adapt.hpcsec.netIf you plan to use the agent or other components of HPCsec Protect then you should also open up outbound connectivity to TCP port 443 to all of the following hosts:
md-adapt.hpcsec.net
md-art.hpcsec.net
md-np.hpcsec.net
md-p.hpcsec.net
Finish
With all of the above done your adapter should check into the environment and everything should begin working. Once you click finish you will be shown the status of your sensor. It can take a minute or two for things to happen, but the enrolment will keep checking. If, after 5 minutes you don’t get a green light or a webhook notification telling you that enrolment is successful the double check that your adapter is functioning. If it is functioning but you do not see a success message then get in touch and we’ll debug this for you.